Next Generation Hammertoe Fixation
Traditional options for hammertoe fixation have long presented challenges. While K-wire fusion is quick, it often lacks long-term effectiveness. On the other hand, intramedullary fixation can be time-consuming, complex, and costly.
ExoToe™ changes the game. As the first extramedullary device of its kind, it’s designed to preserve the bony canal while being just 0.6mm thin—offering a simpler, more effective solution for hammertoe correction.

EASY. FAST. ADJUSTABLE.
ExoToe™ is designed for efficiency and precision—no intramedullary canal insertion required. Its intuitive sizing, easy placement, and adjustable design ensure optimal fusion angles for successful surgical outcomes.

Competitive Advantages
Interoperative anatomic angle adjustability. Only interoperative adjustable implant that allows straight or customized angle adjustability
Extramedullary device that preserves medullary bone allowing ExoToe to be used as a primary hammertoe device or for hammertoe revision cases
Allows for K-Wire to be used in conjunction with the implant to stabilize the MTPJ
Easy to remove using a Mini-Hohmann
Provides rotational stability
Helpful Resources
Access the ExoToe™ Surgical Technique Guide for detailed insights and best practices.
ExoToe™ was developed by Surgical Design Innovations. The team at Surgical Design Innovations has extensive experience in all levels of medical device development - including product development, early design prototyping, mechanical and cadaveric testing, and early clinical use.
Coming Soon: ExoClip™
The Surgical Design Innovation team’s latest innovation, ExoClip™, will be available soon! Contact us to find a distributor near you.
Surgical Technique
ExoToe™ is designed for minimally invasive precision, eliminating the need for insertion into the intramedullary canal. Its easy-to-size and adjustable placement ensures precise alignment for optimal surgical outcomes.
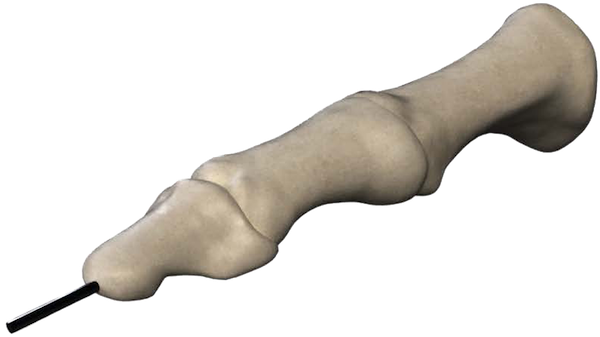
Step 1
Joint Preparation
Prepare the PIPJ fusion site using standard surgical techniques. Make a linear dorsal incision over the proximal interphalangeal joint extending over the middle phalanx to the DIPJ. The extensor tendon is transected at the level of the PIPJ and elevated off the proximal and middle phalanges (alternatively the tendon can be left on the middle phalanx and the ExoToe implant applied over the tendon). Collateral ligaments are released at the PIPJ. Prepare the proximal and middle phalanges for fusion using surgeon preference*. The PIPJ fusion site is fixated with standard K-Wire with or without crossing the MTPJ.**
*Examples: End to end, cup and cone, “V”, etc.
**K-Wire not included
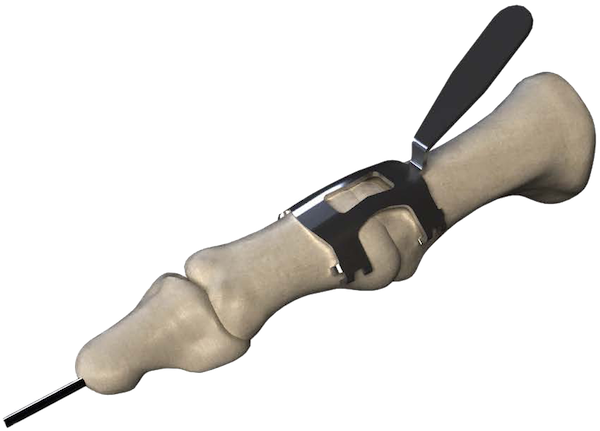
Step 2
Sizing
Once alignment and fixation of the toe with the K-Wire is confirmed, determine the correct size of ExoToe implant to be used. Starting with the largest sizing template (7.5), place the template onto the bone and center it over the fusion site. The sizing template clears the bone when the dorsal aspect touches the bone and the proximal and distal cuffs do not touch the bone. If the template clears the bone, continue with the next smallest size until the template does not clear the bone. Select the ExoToe implant that corresponds with the smallest template that clears the bone.
*If the smallest template (5.5) clears the bone, assess the approximation. If excessive, do not proceed with implantation of the ExoToe implant.
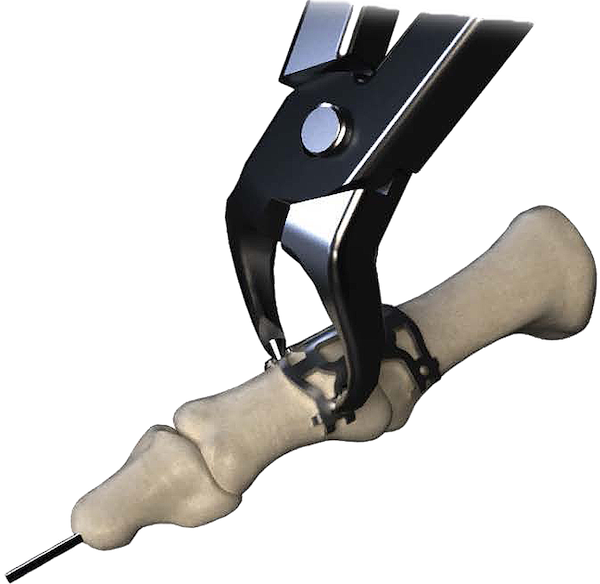
Step 3
Implant Insertion
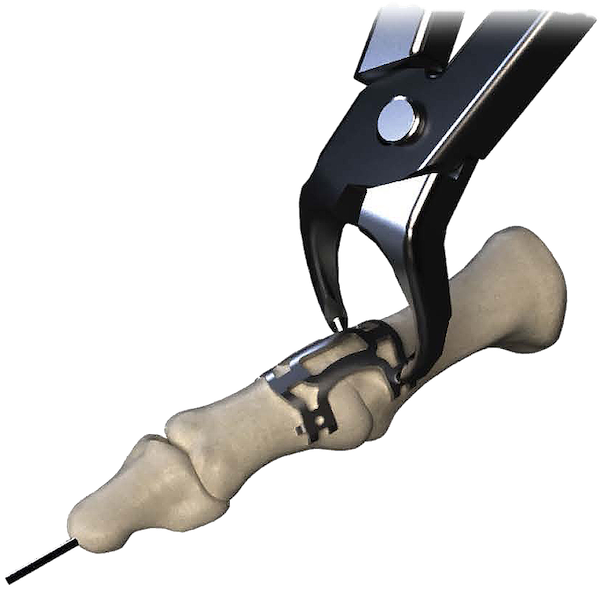
After selection of the correct ExoToe size, remove the ExoToe from the packaging and transfer to the sterile field. Hold the distal side of the tines with the Crimping Forceps. The points of the forceps engage corresponding holes on the ExoToe. Prior to crimping the ExoToe to the bone, ensure manual compression of the proximal and middle phalanx.
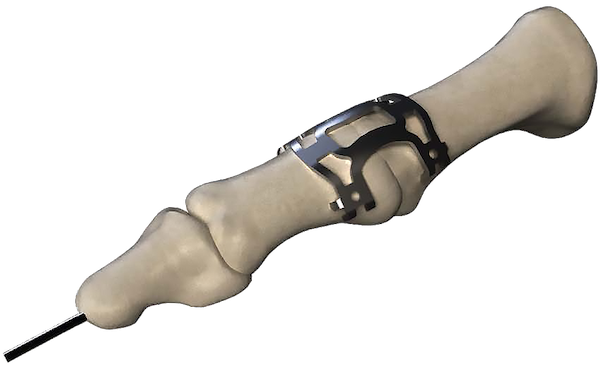
Step 4
Middle Phalanx Fixation
Center the ExoToe implant directly over the fusion site. Dorsal to plantar digital pressure is used to push the ExoToe down onto the fusion site. The forceps are then used to crimp the tines into the middle phalanx in order to secure the ExoToe to the bone.
*Alternatively, the crimping may be completed with a curved Kelly hemostat.
Step 5
Proximal Phalanx Fixation
Once the middle phalanx is crimped appropriately, the proximal portion is crimped to the proximal phalanx, making certain the ExoToe is held close to the bone with dorsal to plantar pressure during crimping. Proper fixation and engagement of the ExoToe to the bone segments is then confirmed.
*Surgeon discretion is used for removal of K-Wire. If control across the MTPJ is preferred, the K-Wire is left in place at the surgeons’ preference.
Wound Closure
Care should be taken to repair the extensor tendon over the implant. If the distal segment was crimped over the tendon, repair the proximal segment of the extensor tendon to the distal stump through the central window of the ExoToe.
Implant Removal
If the surgeon deems the ExoToe placement was unsuccessful, the implant may be removed by placing a Mini-Hohmann retractor into the crimping holes to pry both tines on the lateral side, then remove the implant medially. The staple may be replaced if desired. Removal of the implant is based on surgeon preference. The appropriateness of the selected procedure will be based on the surgeons’ personal medical training and experience.
3 Sizes, One Perfect Fit
Our sizing tool ensures a precise fit for each patient, helping you select the optimal size with confidence.

ExoToe™ is crafted from premium 316 stainless steel.
Dimensions are rounded to the nearest tenth of a millimeter for precision.
GET STARTED
Ready to get ExoToe into your operating room? Get in touch today!
Phone
(515) 201-3723
contact@exotoe.com